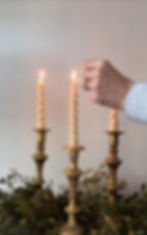
Making Candles for Candlemas: A Home Celebration Guide
- ashleytumlinwallac
- Jan 30, 2024
- 3 min read
Updated: Feb 1, 2025

Candlemas, celebrated on February 2nd, holds a special place in the hearts of many Christians, marking the presentation of Jesus at the Temple and the purification of the Virgin Mary. When Jesus was presented in the temple, Simeon gathered him into his arms, lifted him to the Lord, and prophesied that Jesus was
"A light to bring revelation to the Gentiles,
And the glory of Your people Israel.”
Luke 2:32
Since Jesus was revealed as the “light of the world,” candles have played a huge role in the celebration of this feast. On this day, churches would bless all of their candles for the next year. The congregants would also gather all of their candles and bring them to the local church to be blessed in a special service known as Candlemas (Candle Mass).
For Candlemas this year, try crafting your own beeswax candles. Making your own candles is a fun activity that connects you with centuries of Christian tradition and the joyous community celebrating this feast worldwide. Every time we light our candles, we are visibly reminded that Jesus is the Light of the World.
Here’s a step-by-step guide to making your own candles for Candlemas using silicone molds and beeswax pellets.

Making Your Own Candles For Candlemas
Materials Needed:
Beeswax Pellets These are my favorite. They melt so easily and dry quickly.
Silicone Candle Molds Come with two spiral silicone molds, wicks, and clips.
Wax Melting Handled Pot I love this pot because the wax melts quickly and it has a handle and a spout which makes it so much less messy than a saucepan.
Saucepan (Make sure it's larger than your wax pot)
Stirring Spoon (I used a metal spoon which made clean-up easy)
Scissors
Masking Tape
Instructions:
1. Preparing the Molds:
Cut a length of wick that is 2 inches longer than the mold. Place the wick inside the silicone mold, leaving an inch of wick coming out of the top and the bottom.

Place strips of masking tape around the bottom, middle, and top of the mold to keep it closed.

2. Melting the Beeswax:
Fill a saucepan with around 3 inches of water and place it on the stove. Turn the eye to medium-high or high. Put beeswax pellets in the handled pot or double boiler and place them on top of the larger saucepan. Stir occasionally until the beeswax completely melts.
3. Pouring the Wax:
Once melted, carefully pour the beeswax into your prepared molds. Fill them up to the desired level. Center the wick and secure it at the top with the hairpin that is provided in the kit.


4. Cooling:
At first, I placed my candles in a tall cup so they were upright. When the tops were solid-looking, I laid them on their sides in the fridge. Avoid moving the molds during this time to ensure a smooth finish. Candles should be ready in 2-4 hours.

5. Unmolding:
Once the wax is completely set, gently peel away the masking tape strips and open the silicone mold. If you face resistance, placing the mold in the fridge for a few minutes can help.

6. Finishing Touches:
Trim any excess wick length at the bottom of the candle. Trim the top wick to about ¼ inch above the wax. Your candle is now ready for Candlemas!
Integrating Candles into Your Candlemas Celebration
When Candlemas comes, place the candles you made on your dining or kitchen table. Before dinner or during your evening devotion, use my favorite Liturgy for the Blessing of Candles from Catechesis Books.
May your Candlemas be filled with light and peace. 🕯️✨
